Learning handstand: step by step to your success
How can you learn a handstand safely and sustainably? Whether you are a beginner or have already tried your first handstand exercises – the key lies in an individual training plan. It helps you to work specifically on your strengths and weaknesses in order to make step by step progress.
In this article, we will show you how to learn handstand: from the best exercises for beginners:in to tips for a stable balance. Your path to the perfect handstand starts here!
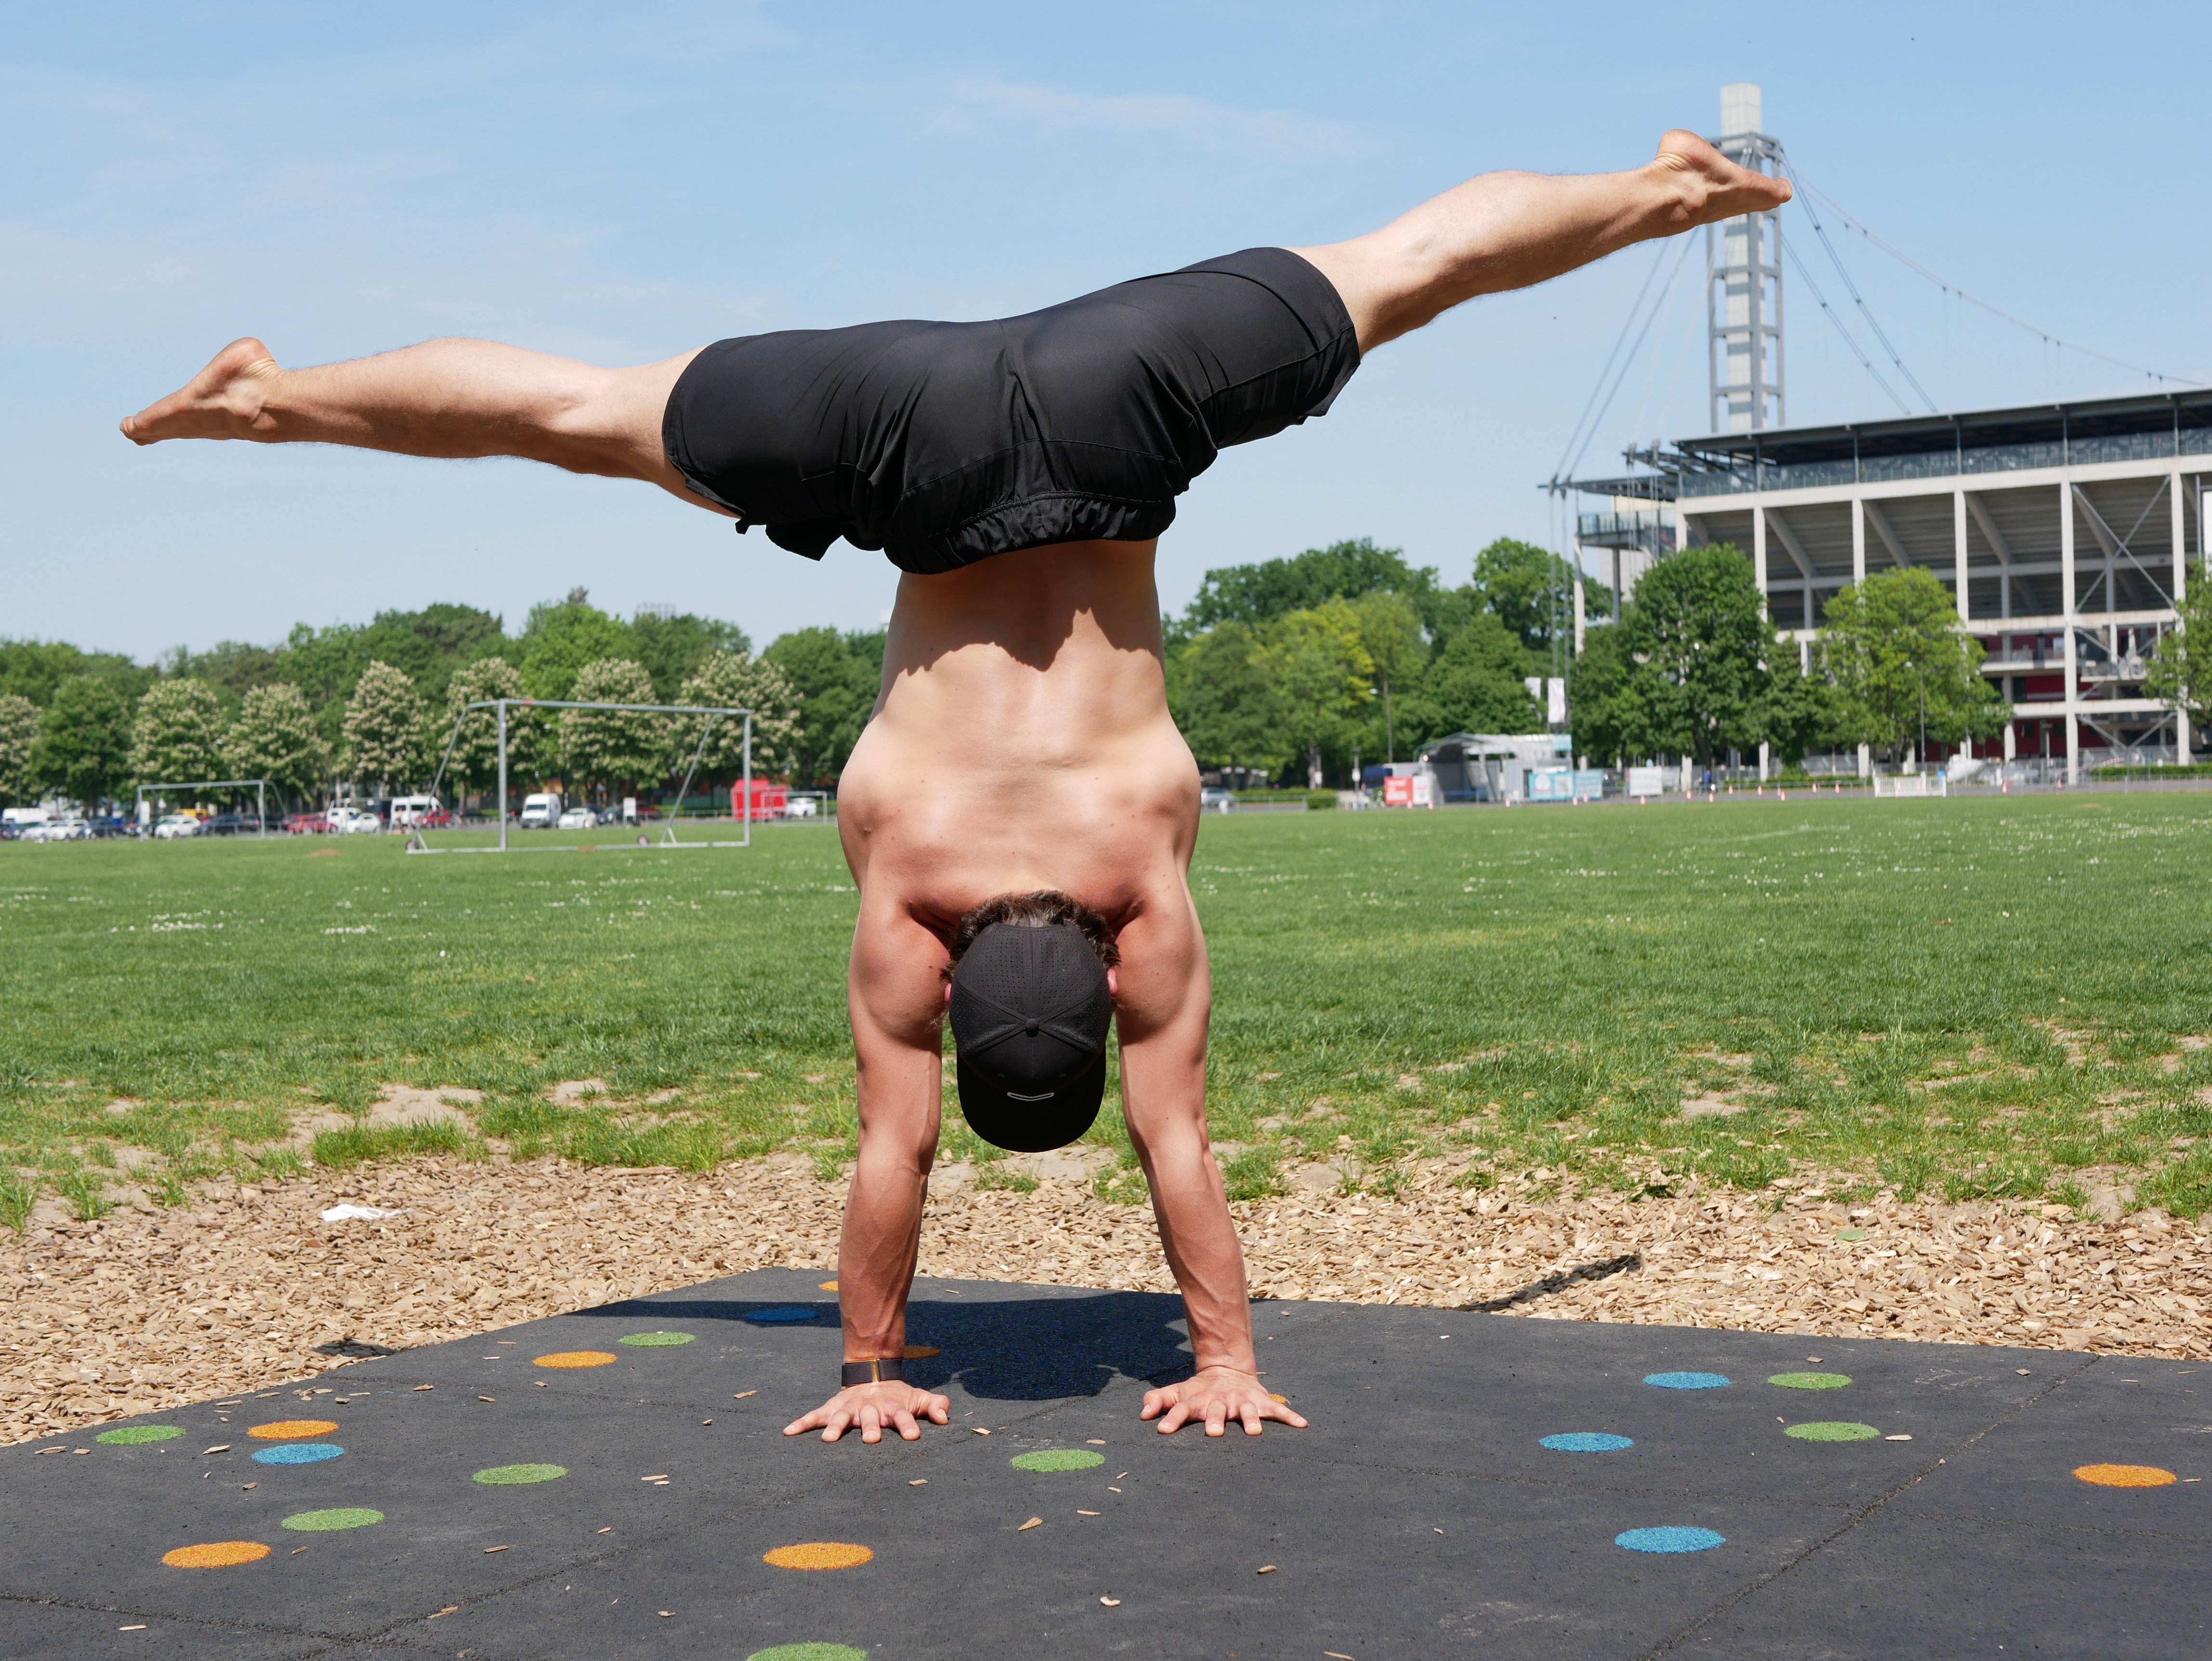
1. Determine starting position: Your handstand status quo
Before you start learning with the handstand, you should get an overview of your current fitness level. The analysis of your physical conditions helps you to better understand your training needs and to design your handstand training. Ask yourself the following questions:
- MobilityIs it easy for you to stretch your arms straight up? Or do you feel restrictions in the shoulders or spine?
- Fundamental force: Have you already built up strength in the shoulder and torso area, for example through other sports or strength training?
- Experience with head-down positionsDo you feel comfortable when your head is deeper than the rest of your body? Or is it unusual for you?
This inventory is crucial to identify your individual strengths and weaknesses. On this basis, you can set yourself realistic and motivating goals that will move you forward step by step in learning handstand. For all three building blocks, you will experience the following appropriate exercises and action steps that will help beginners to learn handstand.
An individual handstand training plan is the key to success, because everyone has different requirements. For example, if you already have a solid basic strength, you can focus more on balance and technique. If, on the other hand, you lack the necessary stability, it is worthwhile to focus on strength and support exercises first.
By tailoring your training plan to your personal needs, you will not only increase the effectiveness of your handstand training, but also your pleasure in practicing handstand. Because nothing motivates more than noticeable progress on your way to the perfect handstand!
2. Effective Warm-Up: The Key to Safely Learning Handstand
The warm-up is an often underestimated but essential part of your handstand training. Many skip it to start directly with the exciting exercises. But a targeted warm-up brings numerous benefits – not only for your body, but also for your mind.
Why is a warm-up so important for the handstand?
- Injury prevention and performance: A good warm-up prepares your muscles optimally for the upcoming load. Your muscles, tendons and joints become more supple, which significantly reduces the risk of injury. At the same time, it increases blood flow and allows you to get your maximum performance in handstand training.
- Mental preparation and focus: Handstand requires not only physical strength, but also full concentration. With an effective warm-up, you focus mentally on the upcoming challenges and increase your motivation. You prepare your body and mind to make headlong progress.
- Targeted improvement of your weaknesses: The warm-up offers you the opportunity to work individually on your weaknesses. Use the time to improve your mobility or specifically activate muscles that are especially important for handstanding. This is how you lay the foundation for long-term progress.
Targeted warm-up exercises for your handstand training
An effective warm-up lasts only about 10 minutes and focuses on the body areas that are particularly stressed in the handstand. Here are some recommendations:
- Wrist mobilisation: Your wrists carry the entire weight in the handstand and are heavily used. To prevent pain and injury, you should mobilize them regularly. Circle your wrists, perform gentle stretches and promote circulation with targeted exercises. More tips and instructions can be found in our blog article: Strengthening wrists
- Shoulder and torso activationPrepare your shoulder belt with dynamic exercises such as Arm circles, Shoulder bridges or Plank variants before. These strengthen and mobilize the important holding muscles.
- Whole body activation: Use light cardio elements such as Hammers or Knee lift trolleysto get the cycle going.
3. Handstand exercises: Focus on recovery and support
After the warm-up, the main part of your handstand training begins: building support strength and learning the upswing. In this phase, you work specifically on the basics that help you to keep the handstand safe and stable.
Learning to support: the basis for a strong handstand
The first step to handstanding is learning to support. This is about building the necessary strength in the shoulders, arms and torso to carry your body safely. Effective handstand preliminary exercises for this are:
- Pike Shoulder TapsTrain your full body stability and strengthen the shoulder area.
- Plank switchesPromote balance and targeted strength development.
- Hollow Body HoldAn ideal exercise to strengthen the torso and exercise the posture in the handstand.
These basics are crucial to later execute the handstand safely and in a controlled manner. Once you have built up the support force, you can dedicate yourself to the head up position and the uplift into the handstand.
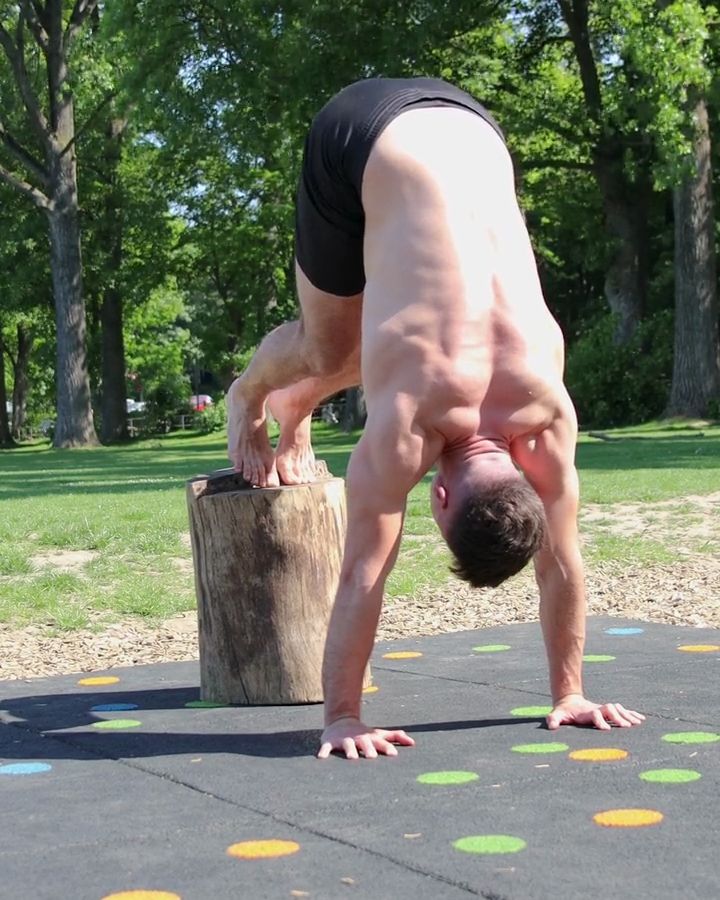
Handstand Pre-exercise for the head-over position: supported handstand
The supported handstand gets you very close to the right head-over position. With the exercise, you get to know the head-over position and continue to strengthen your supporting power.
Necessary equipment

The correct execution:
- Start in a handstand with your feet on a box
- Place your hands as close as possible to the box
- The hips are the highest point and your upper body is in extension of the arms
- Arms are stretched and shoulders are pulled up to the ears
- Keep tension in the torso
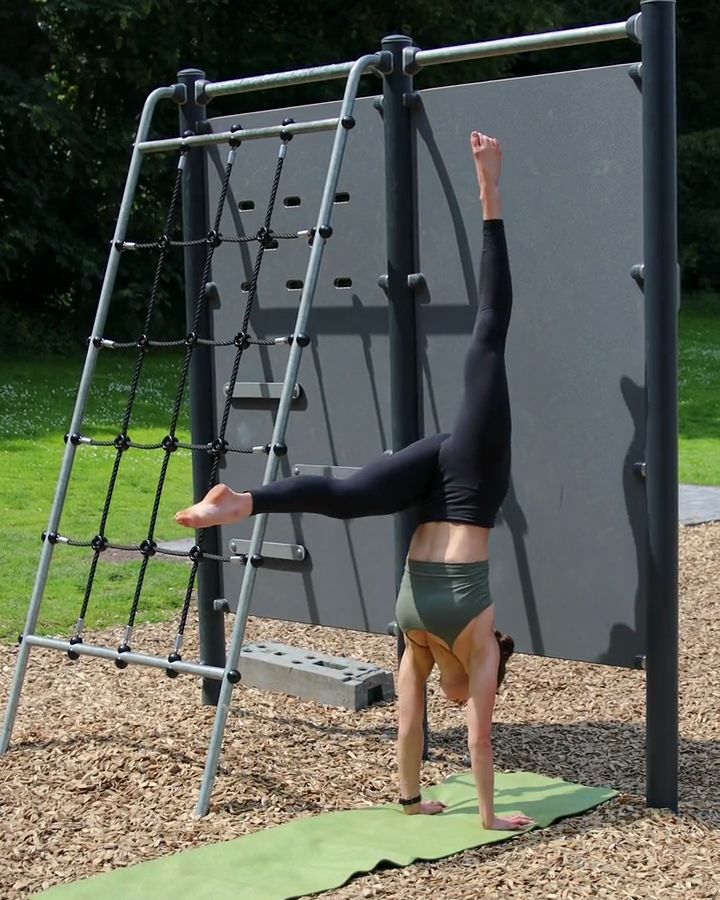
Upswing + L- Handstand for beginners :Inside
An exercise where you gradually put your legs in the air and focus on holding them. As a beginner: we recommend training the whole thing in front of a wall to avoid a rollover.
Necessary equipment

Here's how it goes:
- Start off by standing in front of a wall
- Make sure there is enough space next to you
- With this exercise you will learn how much power you need to swing your swing leg over your head
- Place your hands about 30 cm from the wall
- Now swing your swing leg (back leg) over your head in extension of your torso
- Your swing leg is horizontal to the floor
- Try to find the optimal power for you to swing up into the handstand
- Hold the position for a maximum of one second and return to the standing position in a controlled manner
- Try not to touch the wall during the exercise
- Use the wall only if you swung up too much and overturn. See last video
4. Learning Safety at Handstand: Tips for the Right Fall
One of the most important elements in handstand training is safe falling. For many beginners, the thought of overturning is deterrent, as it is often associated with uncertainty or even pain. But learning fall techniques in a targeted way not only helps you avoid injury, but also helps you overcome your anxiety – a crucial step on your way to handstanding.
The Importance of Safe Falling
If you want to learn handstand, falling is inevitably part of it. The difference between a controlled and an uncontrolled fall can be enormous:
• Reducing fearBy learning to fall safely, you gain confidence in your body and reduce inhibitions during handstand exercises.
• Injury prevention: Targeted handstand pre-dropping exercises make you feel safe and catch falls without risk.
Once you’re no longer afraid of overturning, you’ll become bolder and can tackle new handstand exercises with more confidence.
Introduction to Fall Techniques: Exercises for the Beginning
You can learn the right fall gradually, and for this the exercise “Recoveries + Exit” Especially effective. This technique can first be trained with wall support to gain security, and later without wall to develop more control and independence.
Training with WallStart in a handstand on the wall. Allow one leg after another to sink sideways along the wall to the floor until the feet reach the stand.
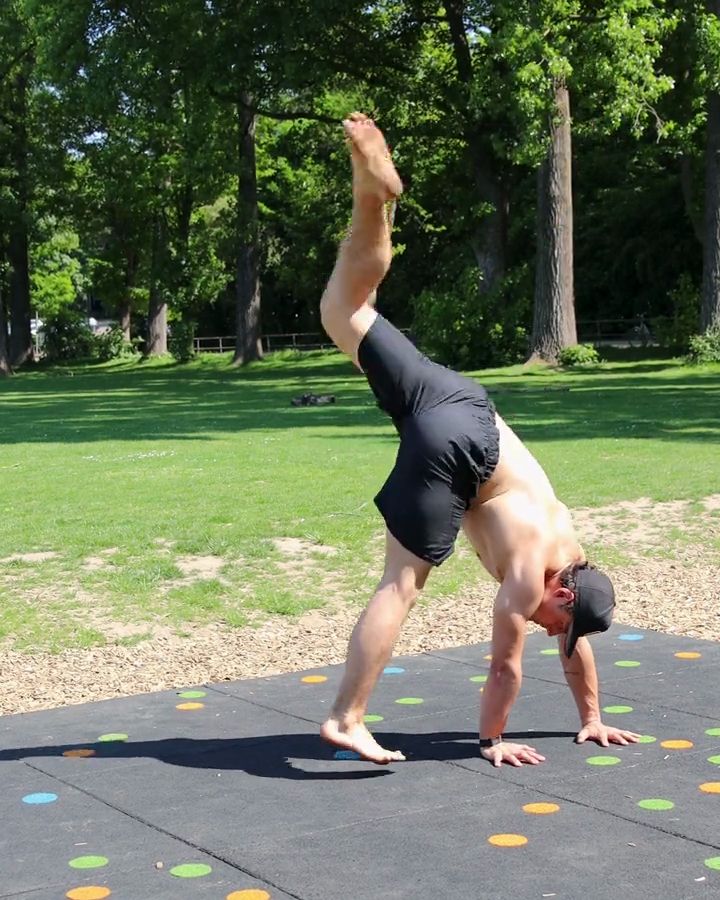
Upswing + Exit: The handstand preliminary exercise for a safe training
Practice without a wall: Once you feel safer, you can practice this exercise freely. Here you learn not only to get out of the handstand laterally, but also to catch a possible overswing with a body rotation.
So you leave the handstand safely:
- Start off by standing in front of a wall
- Make sure there is enough space next to you
- With this exercise you learn how to leave the handstand, for example if you lose your balance
- Place your hands on the floor in front of you
- Now swing your swing leg (back leg) over your head in extension of your torso
- Your jumping leg is horizontal to the floor
- Turn your swing leg to the side
- Place the leg next to you on the floor
- Come back to the standing position
- Try to cover different angles with your jumping leg
This method shows you that falling is not a cause for panic – on the contrary: it becomes an important part of your handstand training. The more you get used to it, the more confident you become in your balance and movement.
5. Mastering Balance: Improving Hand Balancing Skills
Handstand is more than just a static exercise – it’s about combining balance, control and flexibility. Once you’ve mastered the basics, you’ll be able to work on your hand balancing skills to improve your stability and holding time, and later venture into creative variations.
Handstand exercises for a longer holding period
A stable handstand requires patience, training and a keen sense of your body. Here are some exercises that will help you stand in handstand for longer:
- Handstand on the wall of RücklingsStart with an upswing in a handstand on the wall. By pressing your fingers into the ground, try to detach your feet from the wall and find your balance.
- Handstand on the wall of Bäuchlings: The wall handstand with the belly to the wall is an ideal exercise if you want to learn a stretched posture in the handstand. The wall prevents bending of the hip and spine. Try them over the Wall Walk With your hands as close to the wall as possible.
- Practice standing freelyStart with short holding times and increase them gradually. Pay attention to an even weight distribution in your palms.
Training balance in handstand: fingertip control versus posture
Keeping the balance in handstand is an art that requires precise control over your body. There are two main techniques to stabilize balance: either through finger strength or by bending and stretching joints such as hips, knees and shoulders. But not both approaches lead to a clean handstand – and here is the difference.
Balance body weight: fingertips or joints?
1. Balance over the joints
Balancing balance by bending and stretching the hip, knee and shoulder is an instinctive behavior that often happens unconsciously. Your body weight dynamically shifts to maintain balance. The problem: This technique often leads to a “banana posture” in the handstand, since the body does not remain stretched.
- Typical characteristic: A curved posture that is functional but less aesthetic.
- Why avoid?: A clean, straight line in the handstand is not only more beautiful to look at, but also more efficient and stable.
2. Balance over finger strength
The more precise way to control handstand is to balance your body weight over your fingers and palms. With minimal pressure on the fingertips or the ball of the hand, you can make small corrections without losing the stretch of your body.
- Advantage: Your body remains in a straight line, which distributes the load evenly and ensures a clean handstand.
- Practice fingertip controlTrain consciously to control your balance through your hands instead of balancing with your joints. This requires patience, but it is worth it in the long term.
Why fingertip control is crucial
Bending your hips, knees, or shoulders may seem easier in the beginning, but it leads to unclean handstands and an inefficient weight shift. When you learn to control your weight through your fingers, you can:
- A stable balanceWithout your body collapsing.
- A clean formNot a banana, but a straight line.
- Long-term progress: By focusing on the right technique, you develop a better sense of balance in the handstand.
Handstand Practice with Expert Knowledge
If you want to learn more about the importance of fingertip control, we recommend the interview between Paul and Dr Jonas Rohleder’, a performance gymnast and handstand expert from the German Sports University. It explains in detail how to optimize control over your fingers to achieve the perfect balance in handstand.

Experimenting with Movements: Fun at Handstand Variations
Once you can keep the handstand stable, a world of creative possibilities opens up for you. Games with different movements to find new challenges:
- Handstand runningCarefully move forward or backward to improve your control over the handstand.
- Turning in handstandTry turning your body slightly to the side to train your coordination.
- Movements with legs and armsVariations like opening your legs in the air or changing hand position bring momentum to your workout and are fun.
These exercises not only promote your control, but also make your handstand training varied. Some exciting handstand figures show you, Paul and Felix in the following video.

The role of flexibility in handstand training
A straight line in the handstand not only looks aesthetic, but is also essential for a stable balance. But often the reason for a “banana posture” is not only a lack of strength or balance, but also a lack of mobility – especially in the shoulder and thoracic spine.
If you lack the flexibility to keep your arms completely stretched over your head while handling loads, your body center of gravity shifts. This makes it almost impossible to hold the balance directly above the hands. The hip, spine and knee joints must compensate for this deficiency by bending, resulting in the well-known “banana shape”.
To avoid this, you should promote flexibility and mobility in every training session:
- Shoulder mobilityExercises such as Shoulder openings with a gymnastic rod or Resistance band or Hangings on a pull-up bar; or Turning rings Improve your mobility in the overhead position.
- Chest spinal mobilisationUse a foam roll or targeted exercises such as Wall slides or Spine wavesto increase mobility in the upper spine.
- Whole-body exercises: The Bridge Controlled bending back is ideal for boosting your overall flexibility while building strength.
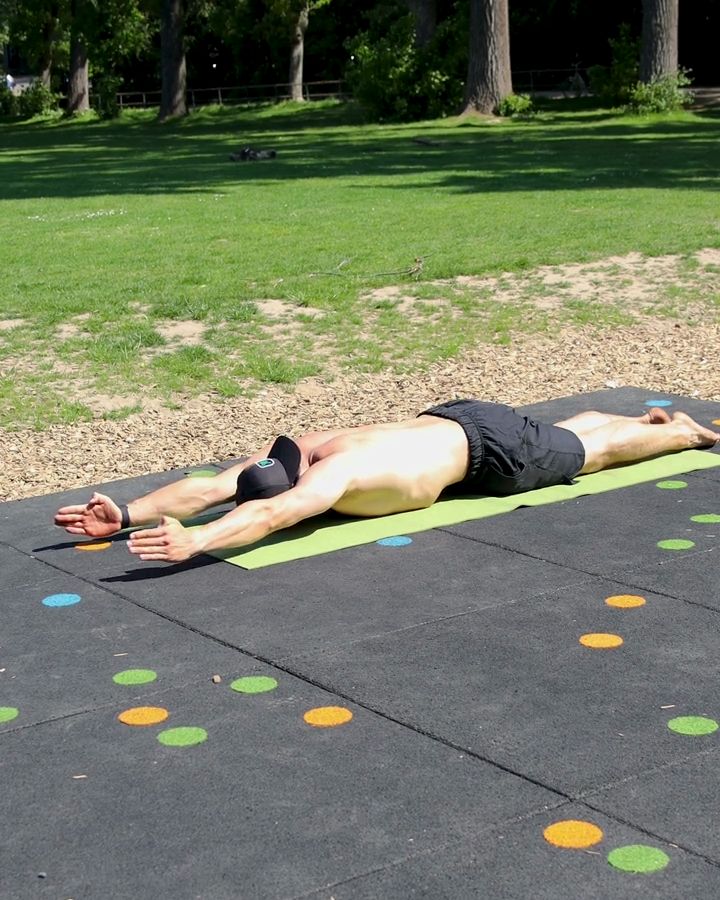
Reclining handstand: mobility test and handstand exercise
The lying handstand is an effective exercise to test your agility for the handstand. You lay flat on the floor, stretch your arms forward to the maximum and lift them off the floor slightly. At the same time, you deliberately pull the belly button towards the spine to build up a stable trunk tension. The goal is to hold this position for 30 seconds. If you manage this without problems, this is a good sign that you can achieve the necessary stretch in the handstand position. If not, you should work specifically on your shoulder and torso mobility to improve your handstand technique.
Necessary equipment
This is how the lying handstand goes:
- Start in prone position
- Push your lower back up and create space under your belly (PPT)
- Stretch your feet backwards
- Firmly tighten your buttocks
- Stretch your arms long over your head and lift them off the floor
Flexibility as the Key to Success
Regularly work on your mobility, especially if you find it difficult to stretch your arms over your head and hold loads there. Only in this way can you position your body center directly above the hands and avoid the “banana”.
By combining flexibility, mobility and strength in your training, you create the basis for clean technique and take your handstand to the next level!
6. Practicing handstand: Quality instead of quantity is the key to success
In handstand training, it is not the amount that matters, but the quality of your exercises. It’s not about how often you train, but how consciously and effectively you use each attempt to make progress. A thoughtful mindset can help you avoid frustration and achieve your goals sustainably.
Why Breaks Are Crucial
Breaks are an often underestimated part of training. If you try the handstand again and again unsuccessfully, you are more likely to overexert yourself or get frustrated. You not only lose the fun of training, but also the focus on the technique.
After a failed attempt, it is helpful to pause briefly:
- Reflect on your last attempt: What has not worked? Was it the balance, the force or the position?
- Prepare newlyUse the break to adjust physically and mentally to the next attempt.
This allows you to focus on each attempt and make your training more efficient.
Error Analysis and Adaptation: Learn from Every Trial
Each handstand attempt offers the opportunity to learn something new about your body and your technique. Instead of giving up frustrated, it helps analyze your mistakes:
- Observe your attitudeHave you been in a straight line or has your body slipped into a “banana shape”?
- Check your balanceHave you put too much or too little pressure on your fingers?
- Adapt your techniqueUse these insights to optimize your next attempt.
With a clear error analysis, every attempt becomes a step forward, even if it was not perfect.
Developing the Right Mindset to Learn Handstand
Patience and a focus on the process are essential for long-term success. Handstand is a challenging exercise that requires time and dedication. A suitable mindset will help you stay on the right path:
- Patience instead of haste: Progress does not come overnight. By taking your time, you achieve your goals more sustainably.
- Focus on the processEnjoy the training itself instead of just waiting for the final result. Every improvement, however small, is a success.
- Accept setbacks: Mistakes and setbacks are part of this. They are a natural part of the learning process and help you become better.
In the following video, Paul shows you what he has learned from several years of handstand training and what mistakes you can already avoid to get to your goal faster:

Quality over quantity: The key to successful handstand
Imagine practicing the handstand and it just doesn’t work out after several attempts. Instead of falling into a vicious cycle of frustration and repeated failure, stop and reflect. A break, a brief analysis and a conscious restart often make the difference.
With this approach, you can not only improve your technique, but also preserve your enjoyment of training. Through the principle of “quality instead of quantity” you will achieve your goals faster and more effectively.
Conclusion: Learning handstand made easy
The handstand is more than just an impressive exercise – it is a holistic training for the body and mind. By learning the basic techniques, working on your balance and developing a conscious mindset, you can progress step by step.
Important points on your way to learning the perfect handstand:
- Analysis of your starting position: Set individual priorities and build on your strengths and weaknesses.
- An effective warm-upPrepare your body and mind for the stresses to avoid injury.
- Technology and safetyTrain support strength, recovery and safe falling to practice with more confidence.
- Mastering balanceUse fingertip control and improve your hand balancing skills for clean form.
- Quality before quantityFocus on clean attempts instead of the number of repetitions.
Get started with the DIE RINGE App
If you want to make your handstand training even more effective, the DIE RINGE App Your ideal companion. It offers you:
- Personalized training plansAdapt to your goals and fitness level.
- Targeted exercisesFor strength, balance and flexibility, especially for the handstand.
- Community supportShare your progress, get motivation and learn from others who are also working on their handstand skills.
- Additional resourcesTutorials, videos and guides that accompany you step by step.
Calisthenics Training, developed by sports scientists, optimized by smart algorithms – for your best workout.
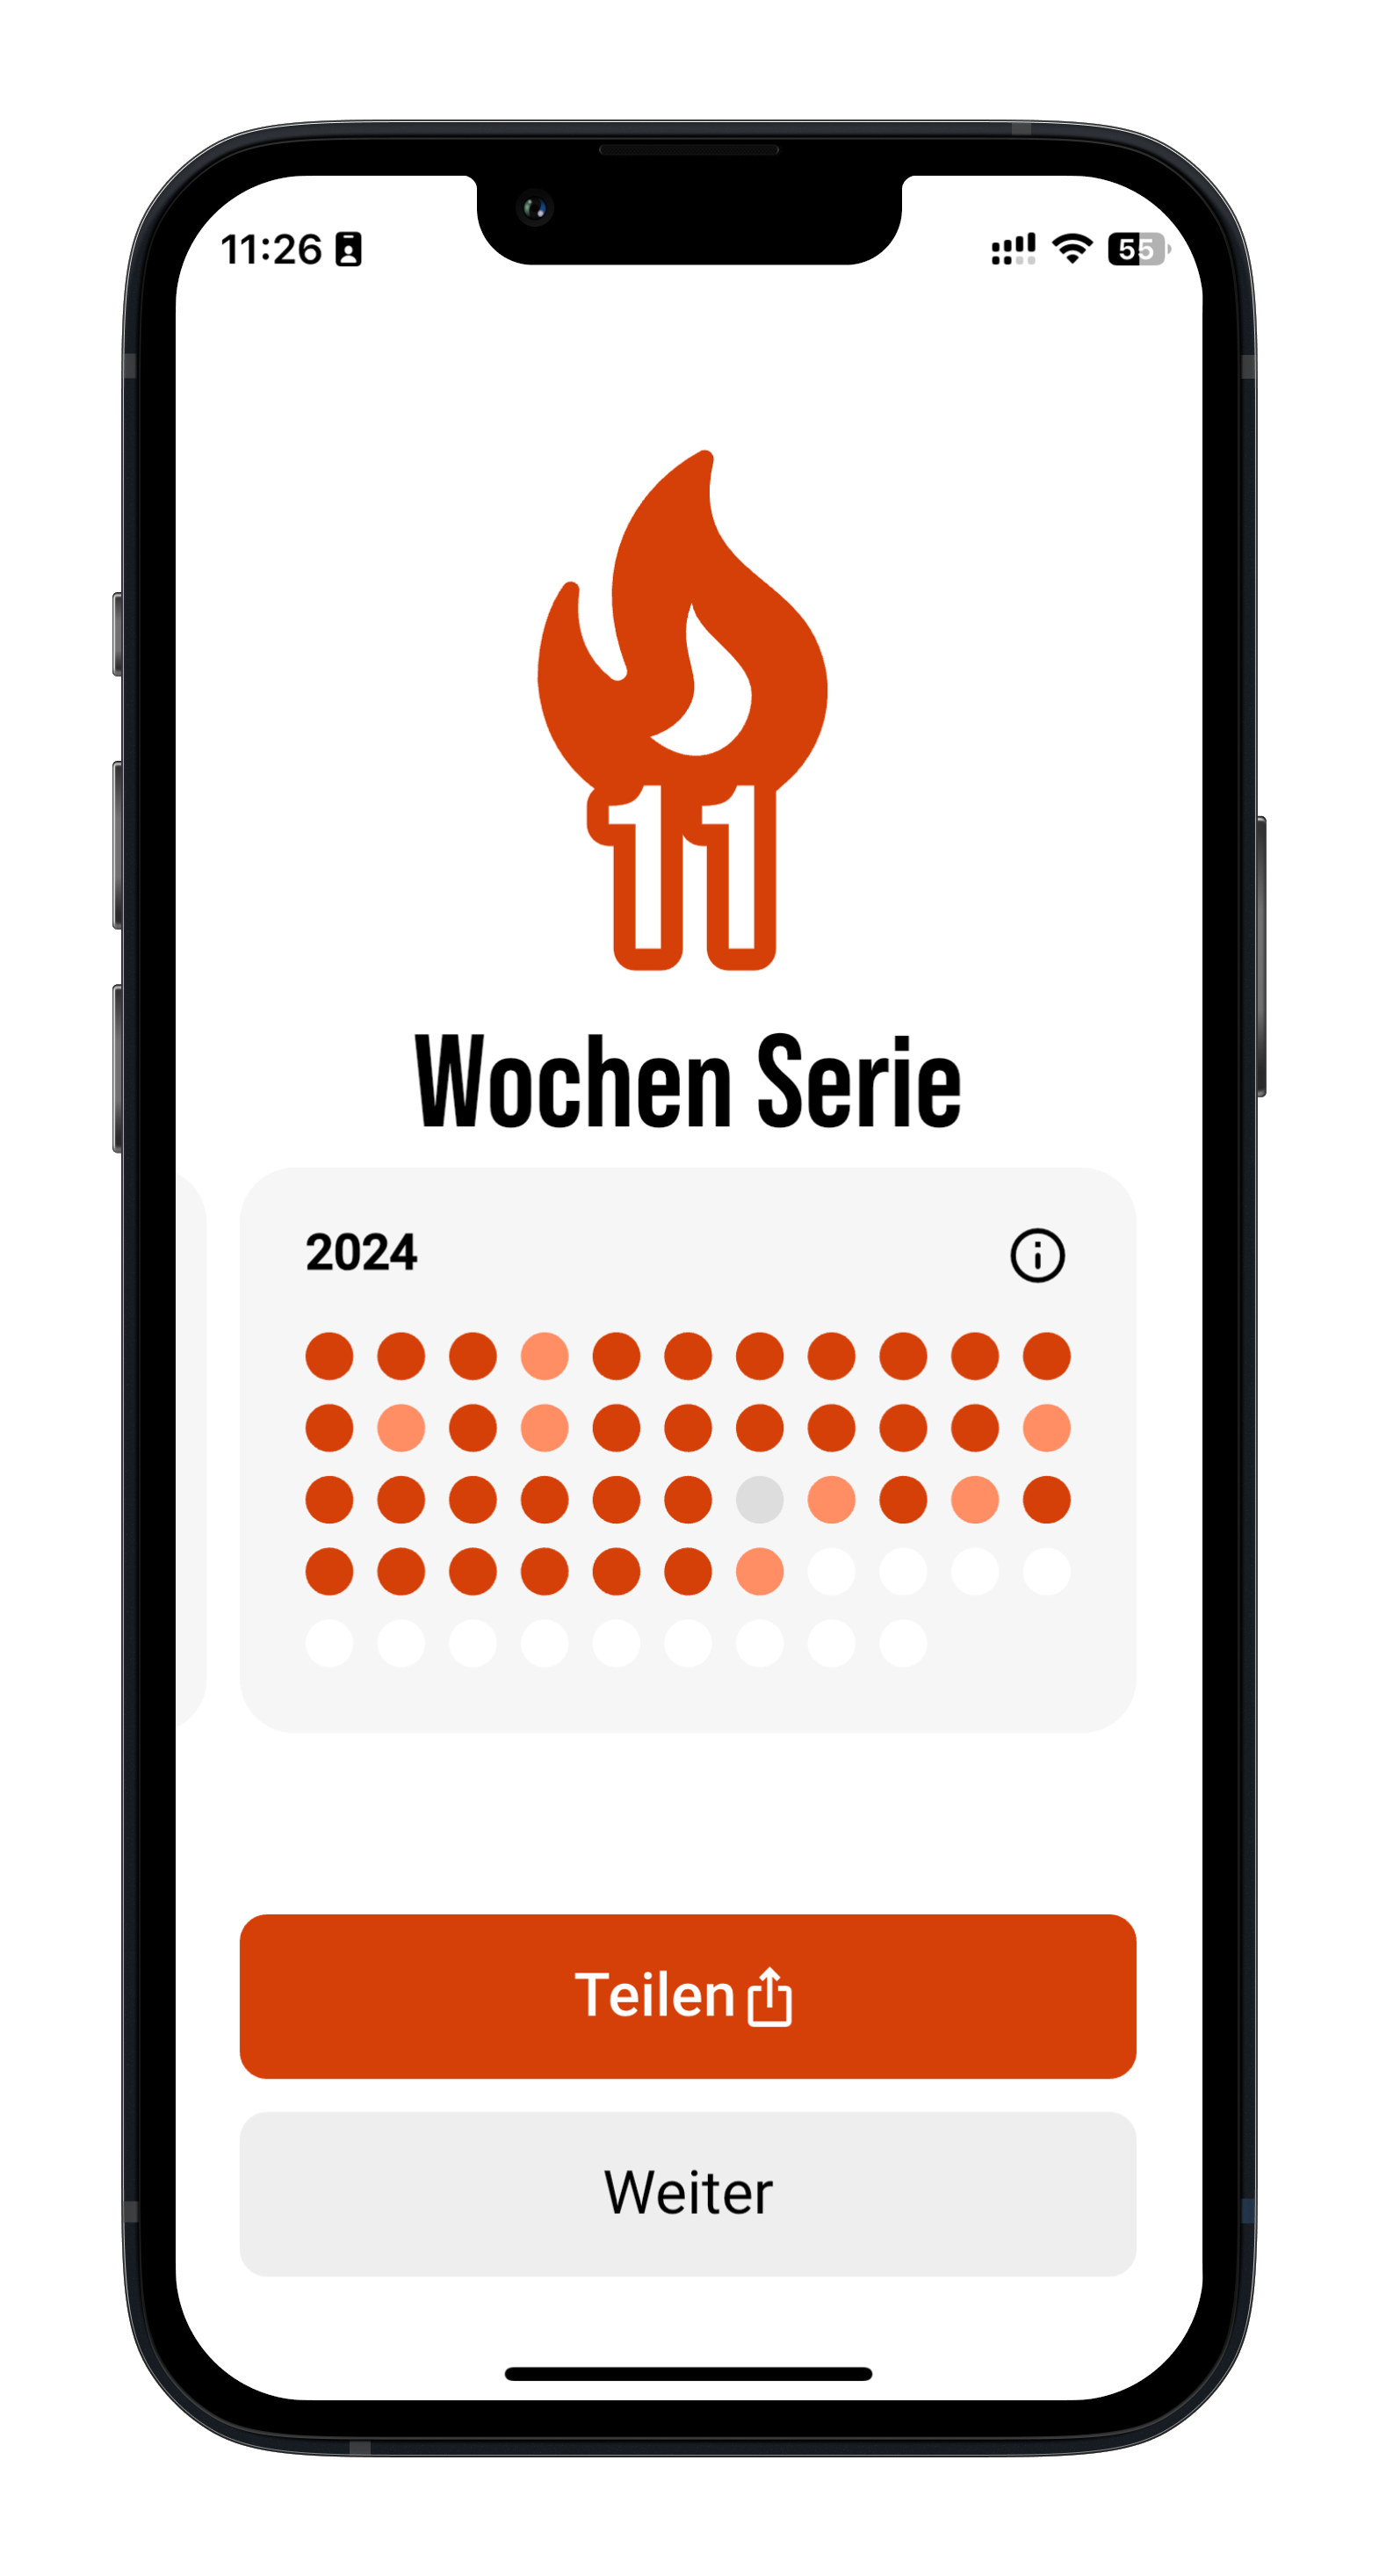
Always motivated
With us, it is easy to make your training a habit – thanks to encouraging features and structured training planning.
Personalized training plan
We combine technology and sports science and adapt your training so that you train at exactly the right level and at the right pace.
Communicate with real people
Just shake the app and give us feedback so we can make the app better or help you with your training.
Developed by Sports Scientists
By combining research-based training methods and effective exercises, DIE RINGE creates training plans that help you successfully build strength and muscle.
Always motivated
With us, it is easy to make your training a habit – thanks to encouraging features and structured training planning.
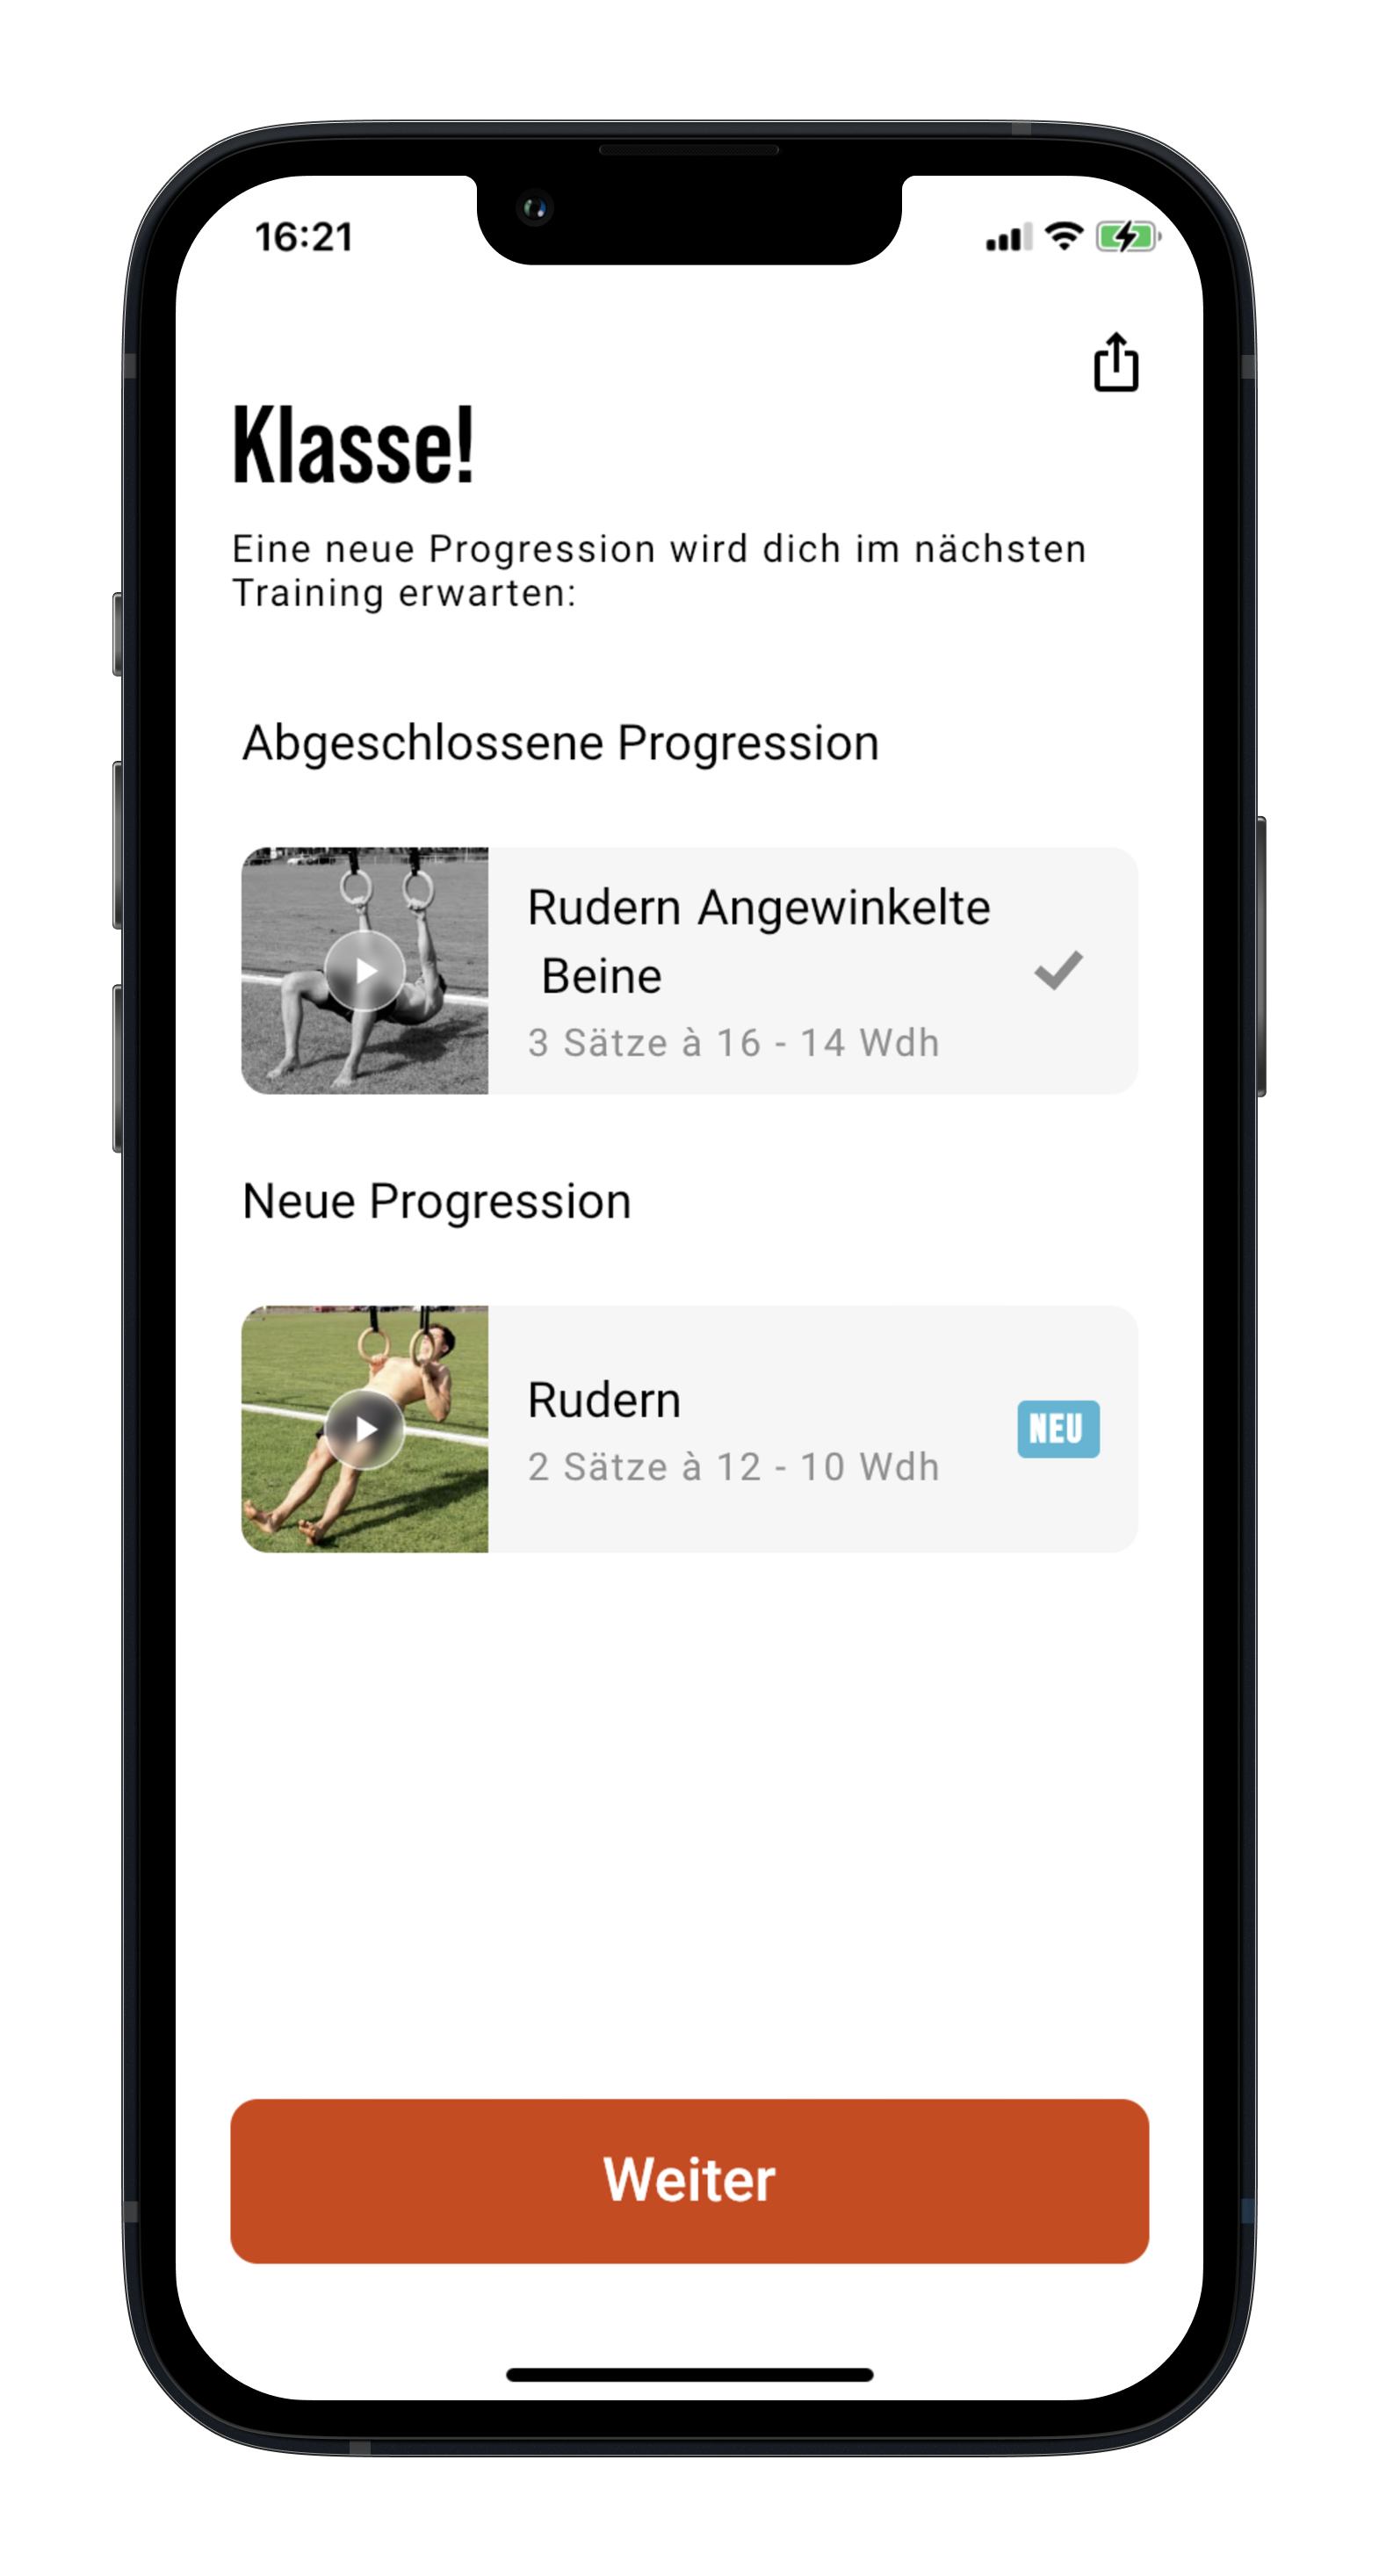
Personalized training plan
We combine technology and sports science and adapt your training so that you train at exactly the right level and at the right pace.
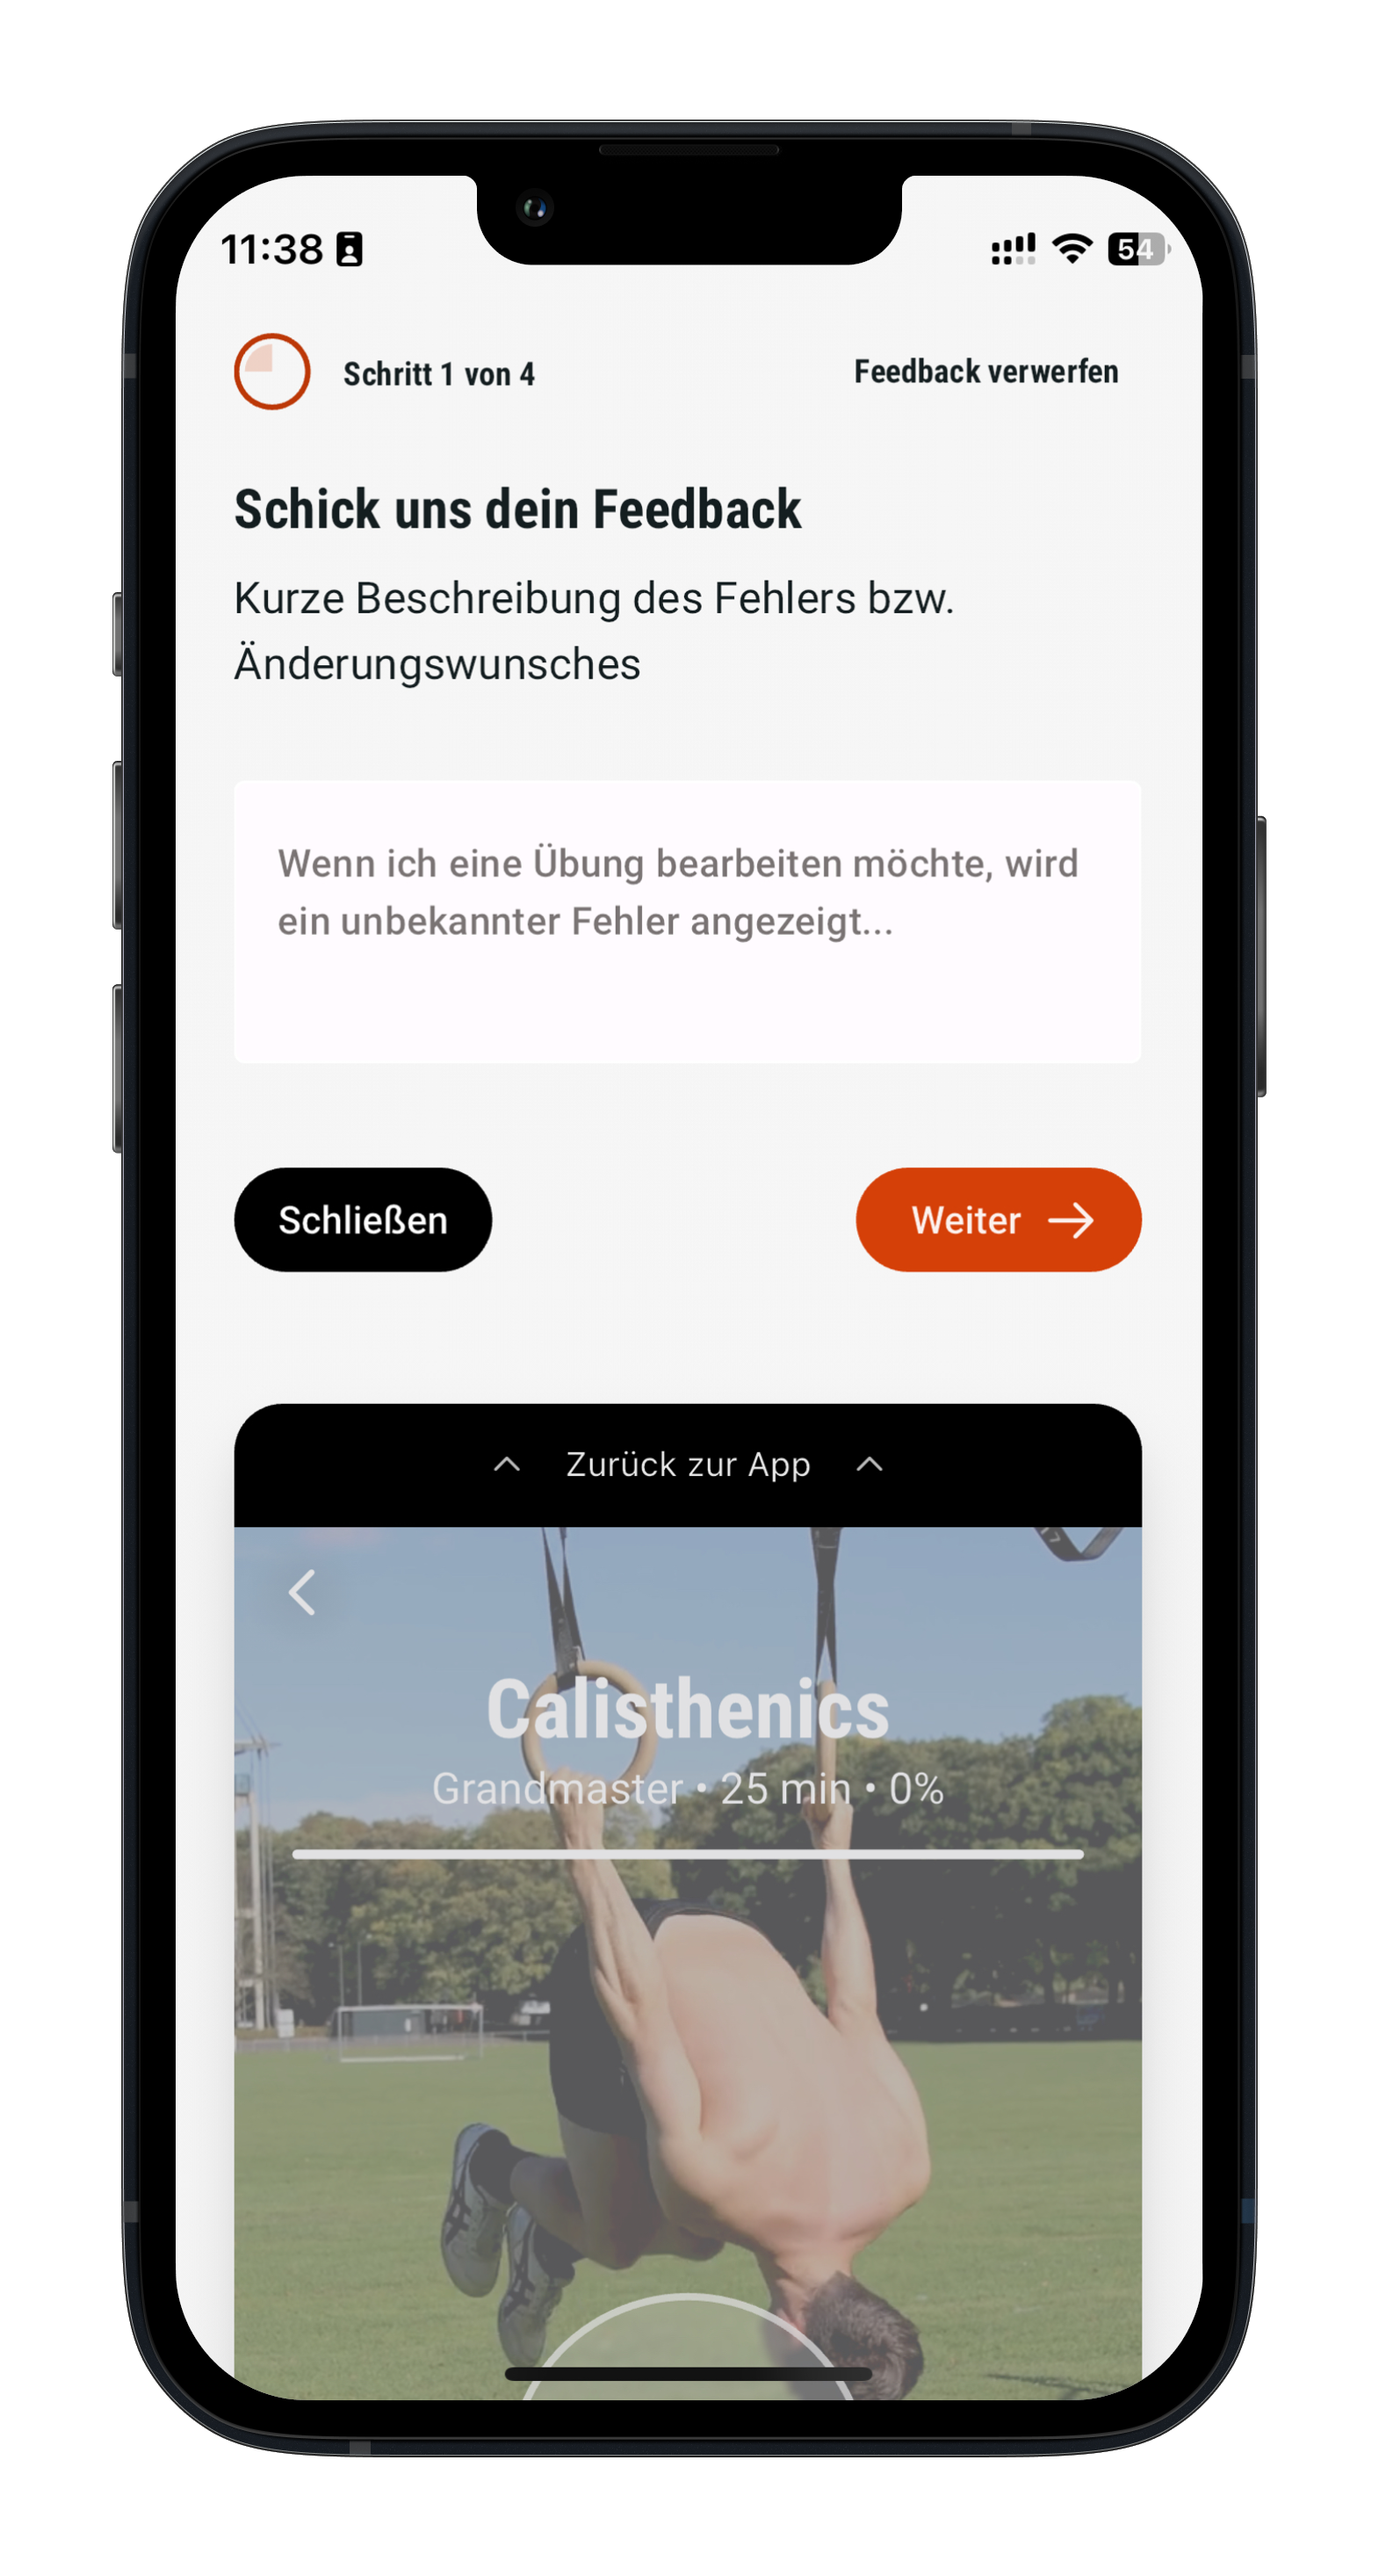
Communicate with real people
Just shake the app and give us feedback so we can make the app better or help you with your training.
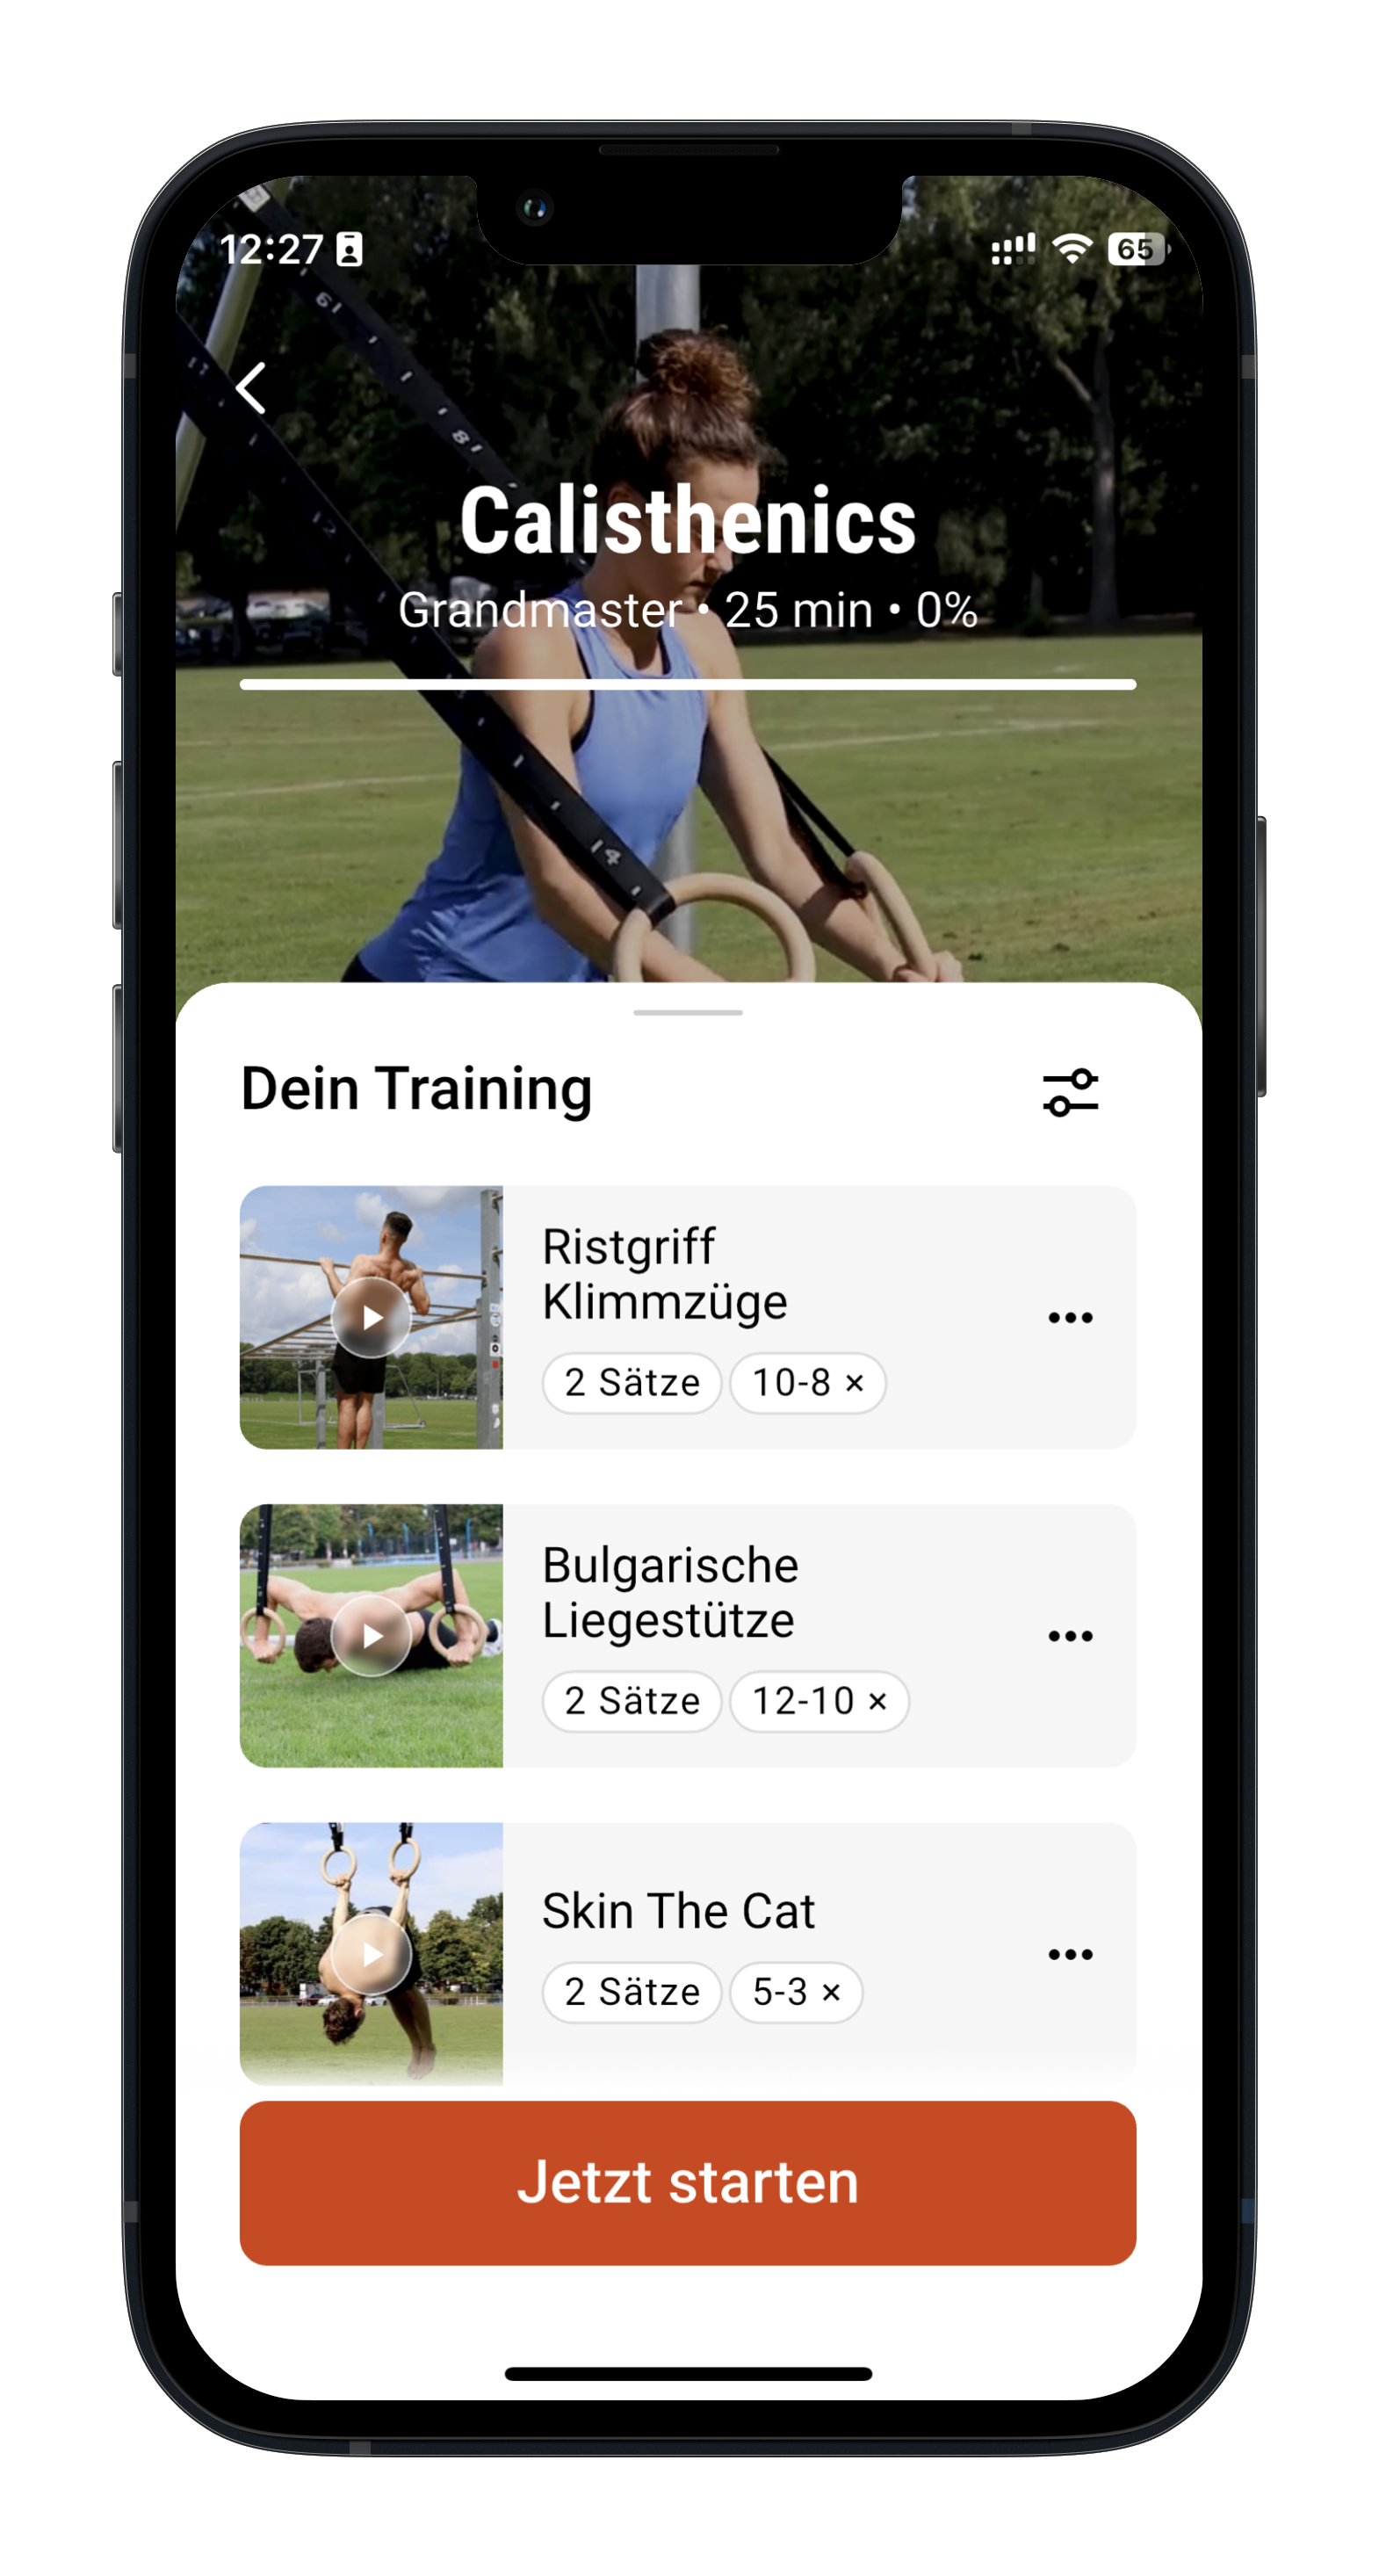
Developed by Sports Scientists
By combining research-based training methods and effective exercises, DIE RINGE creates training plans that help you successfully build strength and muscle.